


Introduction
In today’s connected world, WiFi is the backbone of productivity. Whether you’re working remotely, attending online classes, streaming content, or gaming, a stable wireless connection is essential. However, one of the most frustrating issues laptop users face is when WiFi stops working unexpectedly. That’s why we’ve created this detailed guide — “WiFi Not Working on Laptop – Step by Step Solution” — to help you identify the root causes and fix connectivity problems quickly and effectively.
If you’ve ever stared at the “No Internet Access” message or struggled with a constantly dropping connection, you’re not alone. This article provides a step-by-step solution to fix WiFi problems on laptops, covering both Windows and macOS devices. We’ll also discuss common causes, preventive measures, and best practices to maintain a stable WiFi connection.
Let’s begin troubleshooting systematically so you can get back online quickly.
Common Causes of WiFi Not Working on a Laptop
Before jumping into solutions, it’s crucial to understand why your WiFi may not be working. Common reasons include:
-
WiFi turned off or disabled on your laptop.
-
Faulty network adapter drivers or outdated firmware.
-
Router or modem malfunctions.
-
Incorrect network settings or IP configuration issues.
-
Airplane mode accidentally enabled.
-
DNS or TCP/IP conflicts.
-
Hardware issues with your wireless card.
-
Interference from other wireless devices or networks.
Knowing these root causes helps in applying the right fix without wasting time.
Step-by-Step Solutions to Fix WiFi Not Working on Laptop
Let’s go through each step carefully—from basic checks to advanced solutions.
Step 1: Check If WiFi Is Turned On
Sometimes, the simplest cause is that the WiFi adapter is turned off.
-
On Windows laptops:
-
Press Fn + F2 or Fn + F12 (depends on brand) to toggle wireless on/off.
-
Alternatively, go to Settings → Network & Internet → WiFi, and ensure it’s enabled.
-
-
On macOS laptops:
-
Click the WiFi icon in the menu bar.
-
Make sure WiFi is On.
-
If WiFi was off, enable it and check if your network appears.
Step 2: Ensure Airplane Mode Is Disabled
When Airplane Mode is on, it disables all wireless communication.
-
Windows:
-
Open Action Center → click Airplane Mode to turn it off.
-
-
macOS:
-
Open System Settings → Network → WiFi to confirm it’s active.
-
After disabling Airplane Mode, try reconnecting to your network.
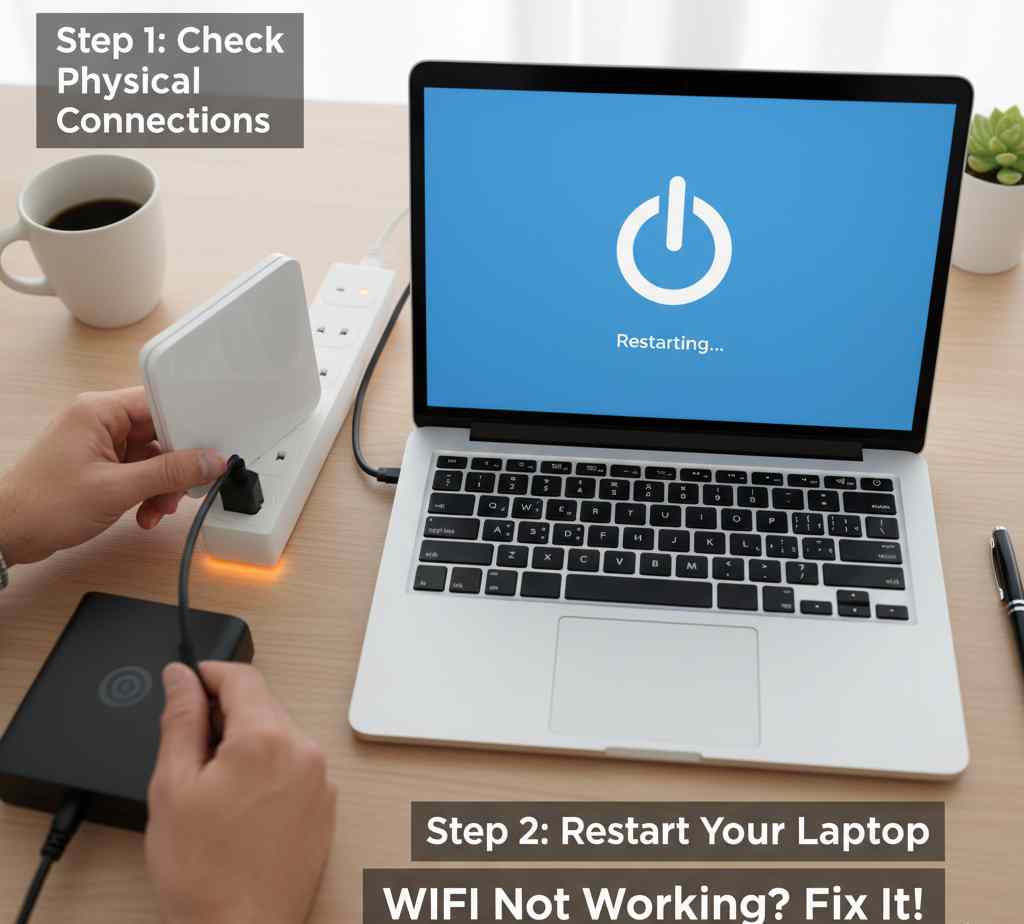
Step 3: Restart Laptop and Router
A simple reboot often fixes connectivity problems.
-
Restart your laptop.
-
Power cycle your router: unplug it, wait 30 seconds, and plug it back in.
Restarting clears temporary glitches and refreshes network connections.
Step 4: Forget and Reconnect to the WiFi Network
If your laptop isn’t connecting to a known network, remove the saved network and reconnect.
-
Go to Settings → Network & Internet → WiFi → Manage Known Networks.
-
Select your network and click Forget.
-
Then reconnect by entering your password again.
This refreshes network authentication and resolves conflicts.
Step 5: Run the Built-in Network Troubleshooter (Windows)
Windows has an inbuilt Network Troubleshooter that automatically detects and fixes common network issues.
-
Go to Settings → Update & Security → Troubleshoot → Internet Connections.
-
Follow on-screen prompts.
It will check for adapter issues, IP conflicts, or driver problems.
Step 6: Check the WiFi Adapter Status
Sometimes the wireless network adapter gets disabled.
-
Press Windows + X → Device Manager → Network Adapters.
-
Right-click your WiFi adapter → Enable (if disabled).
If it’s already enabled, try Disable → Enable again to reset it.
Step 7: Update or Reinstall Network Drivers
Outdated or corrupted network drivers can prevent WiFi from working.
-
In Device Manager, expand Network Adapters.
-
Right-click your WiFi adapter → Update driver.
-
Choose Search automatically for drivers.
If no updates are found, visit your laptop manufacturer’s website to download the latest WiFi driver.
If the issue persists, uninstall the driver and restart your laptop—it will reinstall automatically.
Step 8: Reset TCP/IP and DNS Settings
Corrupted TCP/IP or DNS configurations often cause WiFi problems.
Follow these steps (Windows):
-
Open Command Prompt (Run as Administrator).
-
Type and run these commands one by one:
-
Restart your laptop.
This resets your network stack and refreshes IP configurations.
Step 9: Check IP Address Configuration
If your laptop cannot obtain an IP address automatically, you may need to configure it manually.
-
Go to Network & Internet Settings → WiFi → Change adapter options.
-
Right-click your WiFi connection → Properties → Internet Protocol Version 4 (TCP/IPv4).
-
Ensure Obtain an IP address automatically and Obtain DNS server address automatically are selected.
Click OK and restart your connection.
Step 10: Disable Power Saving for Network Adapter
Some laptops disable WiFi adapters to save battery, leading to dropped connections.
-
Open Device Manager → Network Adapters.
-
Right-click your WiFi adapter → Properties → Power Management tab.
-
Uncheck Allow the computer to turn off this device to save power.
This ensures stable connectivity, especially during long work sessions.
Step 11: Reset Network Settings
If nothing works, resetting your entire network configuration may help.
-
Go to Settings → Network & Internet → Status → Network reset.
-
Confirm and restart your laptop.
This will remove all network adapters and reinstall them with default settings.
Step 12: Check the Router Configuration
If other devices are also struggling to connect, the problem may be with your router.
-
Log into your router’s admin panel (usually 192.168.0.1 or 192.168.1.1).
-
Verify that SSID broadcast is enabled.
-
Check for MAC address filtering or firewall restrictions that might block your laptop.
-
Ensure the router’s firmware is up to date.
Restart the router after saving changes.
Step 13: Change Wireless Frequency Band
Modern routers support both 2.4GHz and 5GHz bands.
If your laptop’s WiFi card doesn’t support 5GHz, switch to 2.4GHz for better compatibility.
-
Log into your router → WiFi settings → select 2.4GHz band.
You can also rename SSIDs (e.g., HomeWiFi_2.4G and HomeWiFi_5G) to connect manually.
Step 14: Temporarily Disable Firewall or Antivirus
Sometimes, security software blocks network access.
To test:
-
Disable your firewall or antivirus temporarily.
-
Try connecting to WiFi.
If the connection works, adjust firewall permissions or reinstall the software.
(Note: Don’t keep it disabled for long; re-enable after testing.)
Step 15: Update Operating System
Both Windows and macOS release updates that include network stability fixes.
-
On Windows: Settings → Windows Update → Check for updates.
-
On macOS: System Settings → General → Software Update.
After updating, restart your laptop and test your WiFi.
Step 16: Try Safe Mode or Clean Boot
Booting into Safe Mode with Networking helps identify if third-party apps are interfering.
-
Press Windows + R → type msconfig → Boot tab → Safe Boot → Network.
-
Restart and check WiFi connectivity.
If it works in Safe Mode, a startup app is likely causing the issue. Perform a clean boot to isolate it.
Step 17: Check for Hardware Issues
If all software fixes fail, it may be a hardware problem.
-
Check if the WiFi adapter is loose (especially on older laptops).
-
Consider using an external USB WiFi adapter to test connectivity.
If external WiFi works, your internal card may need replacement.
WiFi Not Working on macOS – Quick Fixes
If you’re using a MacBook, follow these steps:
-
Turn WiFi Off and On using the menu bar.
-
Forget the network and reconnect.
-
Renew DHCP Lease:
-
Go to System Settings → Network → WiFi → Details → TCP/IP → Renew DHCP Lease.
-
-
Reset Network Configuration:
-
Delete files from
/Library/Preferences/SystemConfiguration/:-
com.apple.airport.preferences.plist -
networkinterfaces.plist
-
-
Then restart your Mac.
-
-
Update macOS to the latest version.
Top 10 Laptop Keyboard Shortcuts – Link
Additional Tips to Maintain a Stable WiFi Connection
-
Keep router firmware and network drivers updated.
-
Avoid physical obstructions (walls, microwaves, cordless phones).
-
Change router channel if interference is high.
-
Place router in a central location for better signal distribution.
-
Regularly restart your router and laptop.
-
Limit connected devices to avoid network congestion.
When to Seek Professional Help
If your laptop still cannot connect after following all these steps, you may need professional assistance.
Contact:
-
Your Internet Service Provider (ISP) to check for outages.
-
A certified technician if your WiFi card or motherboard may be faulty.
Conclusion
WiFi problems can feel overwhelming, but most issues stem from simple settings, outdated drivers, or temporary glitches. By following this step-by-step solution guide, you can systematically identify and fix the issue—restoring your laptop’s connection in no time.
From enabling WiFi and updating drivers to resetting network settings and diagnosing hardware issues, every possible solution has been covered.
A strong, stable WiFi connection keeps your work seamless, your meetings smooth, and your entertainment uninterrupted. So the next time you face a “WiFi not working” issue, refer back to this comprehensive guide and get your laptop back online—quickly and confidently.